Workflow setup
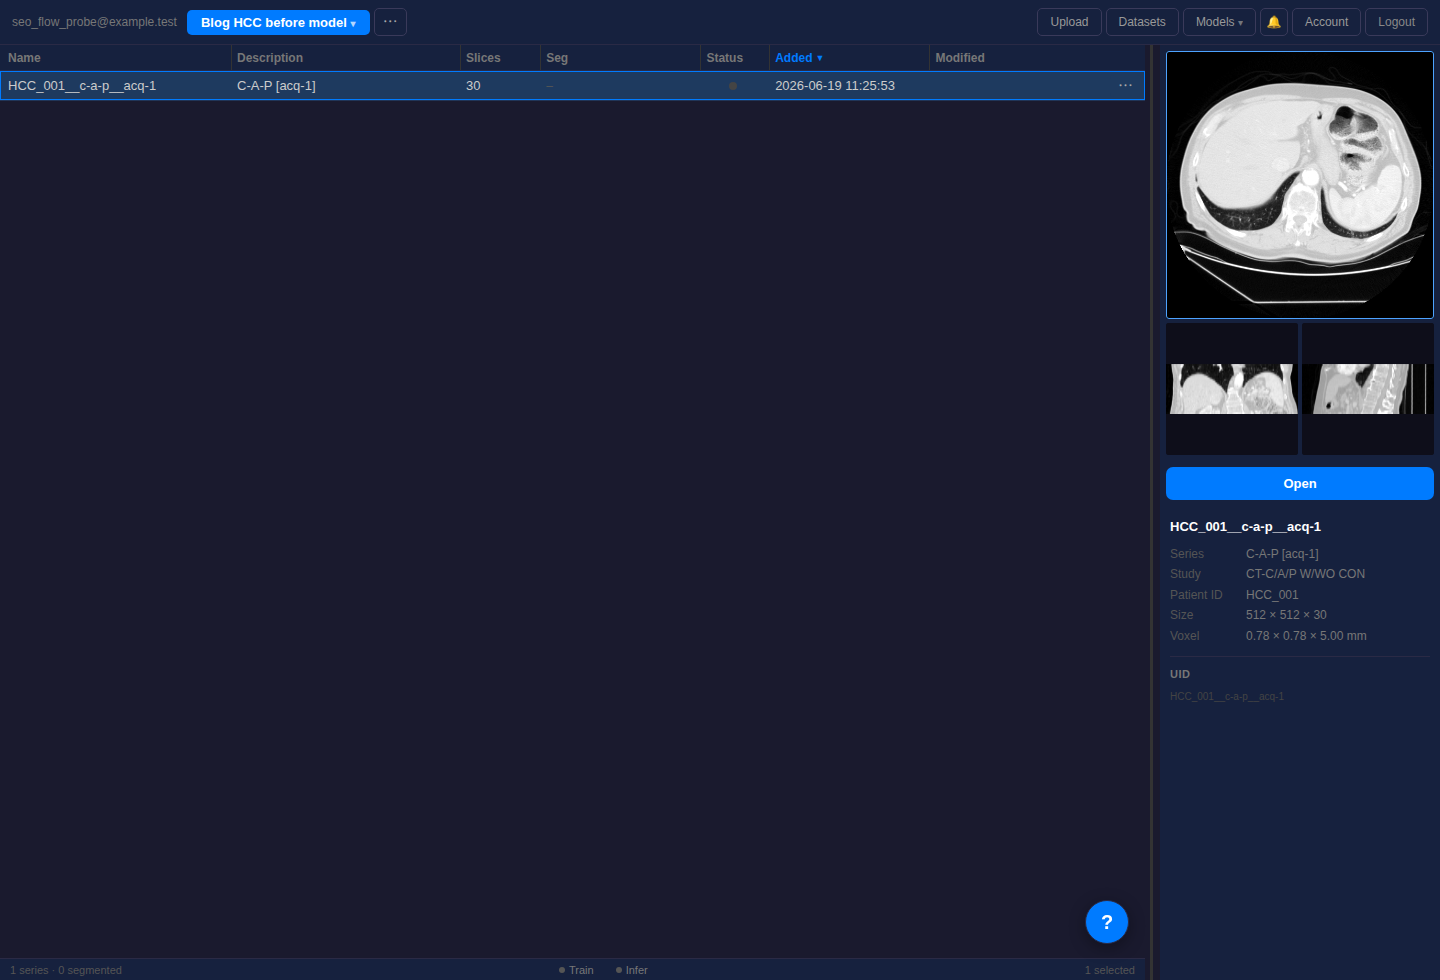
This guide uses HCC-TACE-Seg, case HCC_001__c-a-p__acq-1. In MedSeg, this series is a CT abdomen case with 30 slices, 512 by 512 pixels, 5 mm slice spacing, and no reference segmentation copied into the project.
The model is TotalSegmentator, task CT Total, with only one label selected: liver. One label keeps the result easy to inspect, and it makes the output clearly model-generated rather than copied from the dataset.
This is not a lesion segmentation workflow. It does not run a tumor, vessel, or lesion task. The point is the full route through MedSeg: find data, create a project, run a model, check the result, and export it.
Research use only. MedSeg is not a medical device. Do not use this for diagnosis, screening, prognosis, treatment planning, or patient management.
1. Sign in to app.medseg.ai
Open app.medseg.ai and use Continue with Google. That is the fastest account setup for most users because it signs you in and creates the account in the same flow.
Email and password are also available. Use Create account under the login form if you do not want to use Google sign-in.
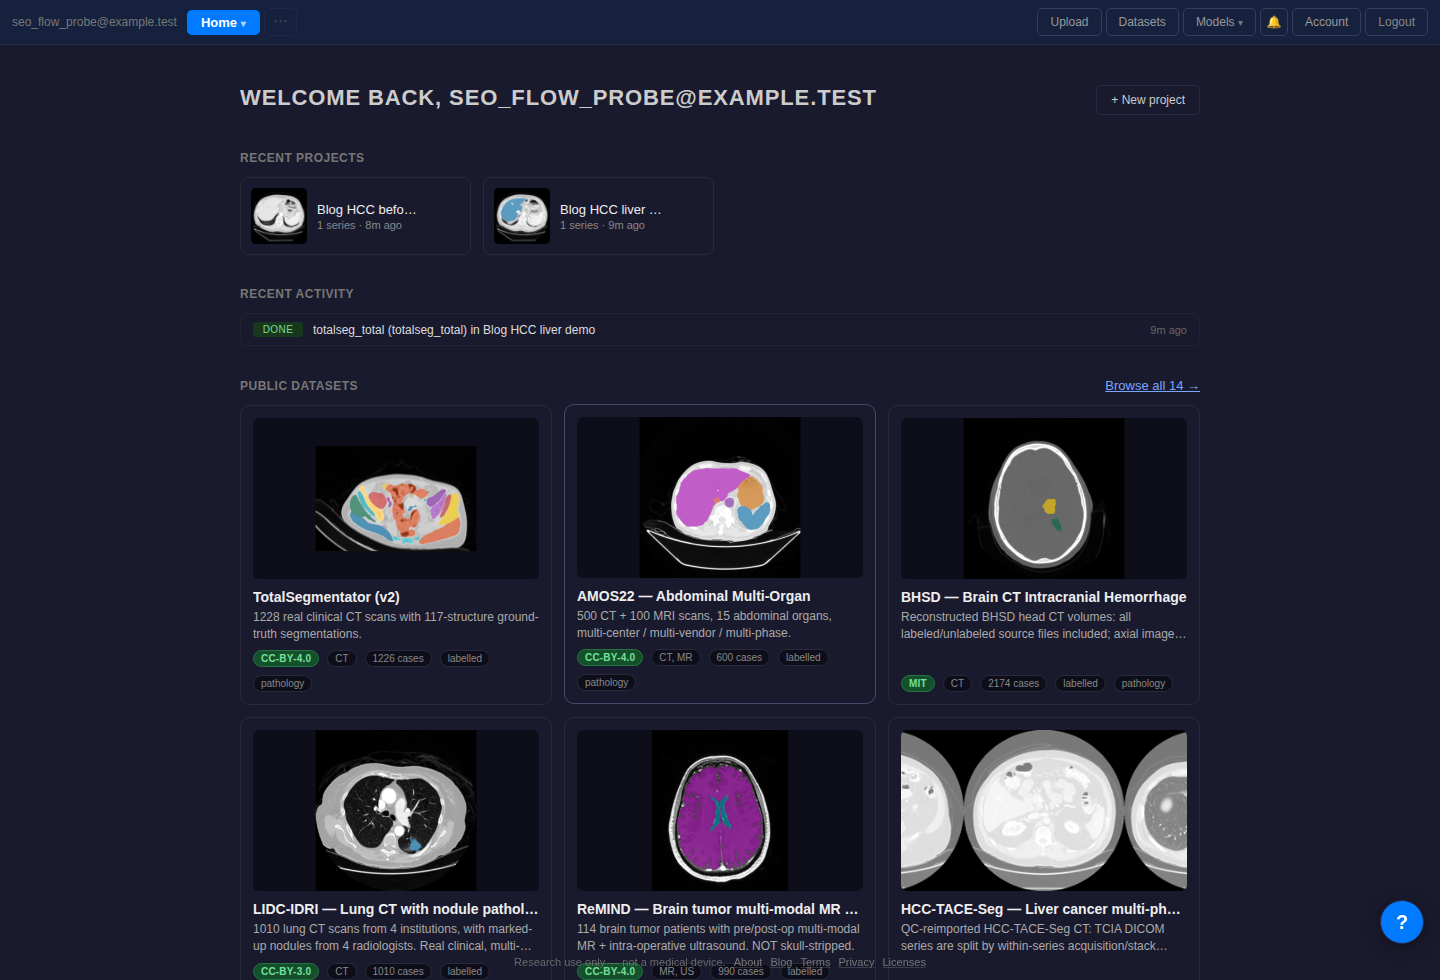
After sign-in, the home screen shows recent projects and public datasets. A new project can be created manually, or created later from the public dataset copy dialog.
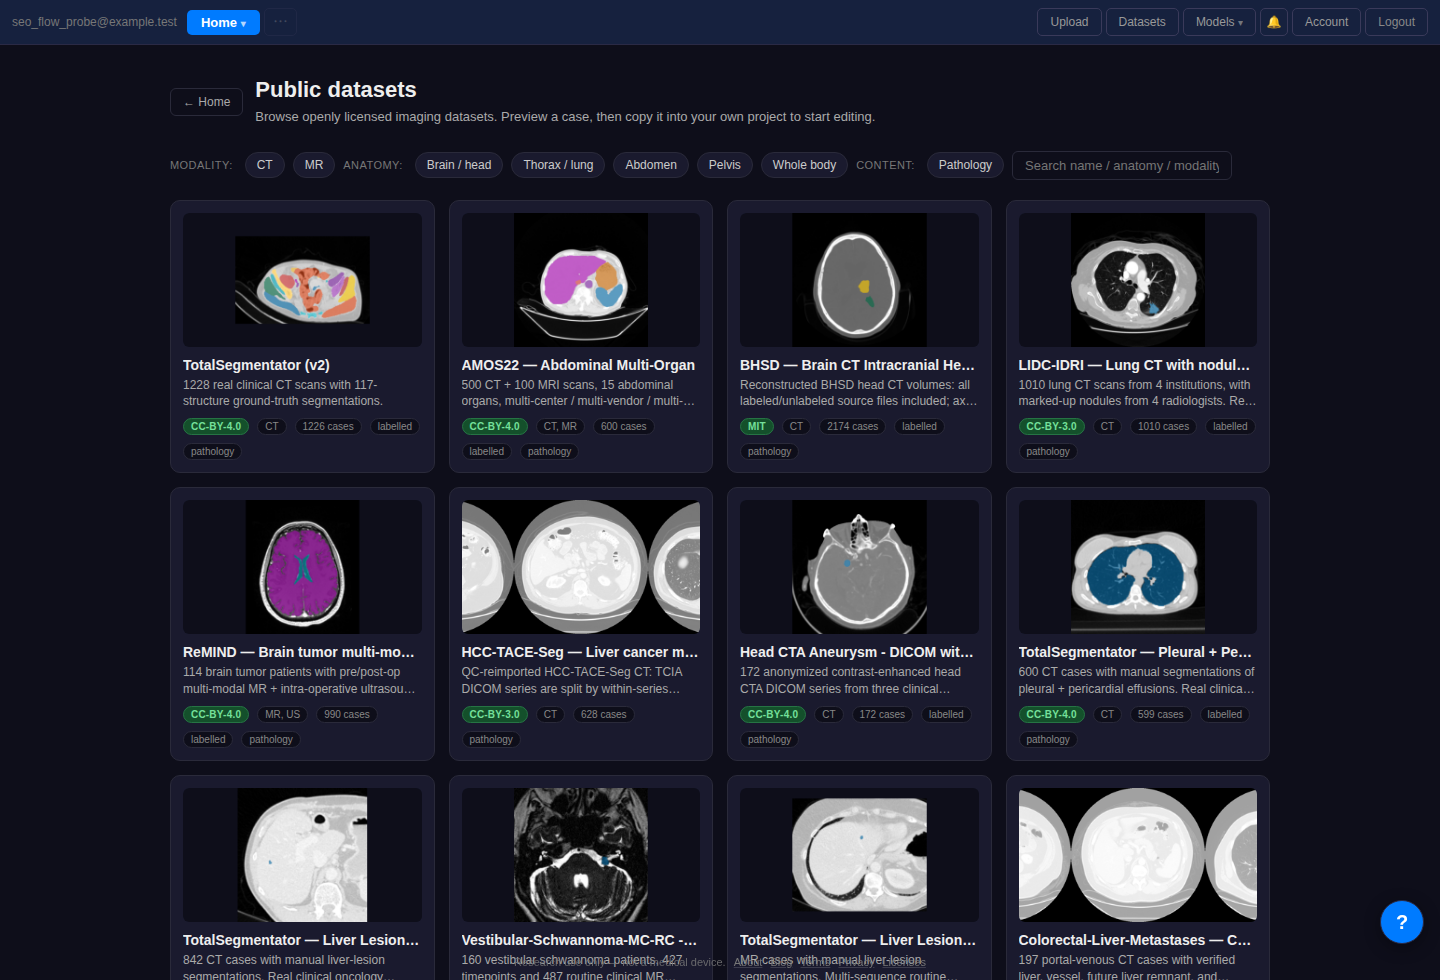
2. Open Public datasets
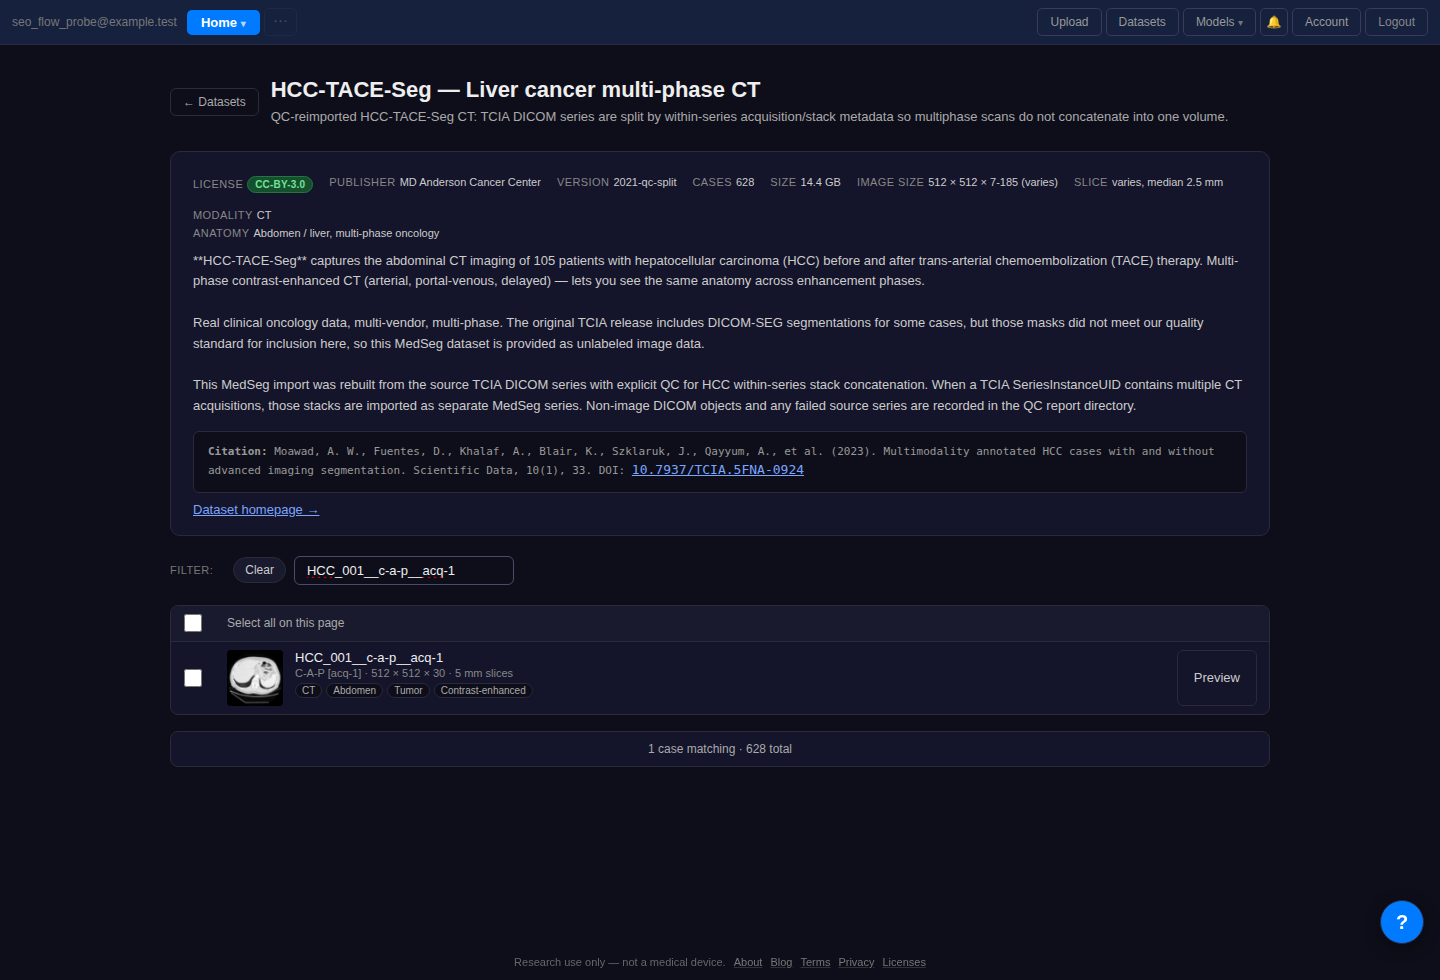
Click Datasets in the top bar. This opens the public dataset catalog. For this workflow, the useful filters are CT, abdomen, and pathology, but the HCC dataset is also easy to find from the search box or the visible catalog cards.
3. Pick the HCC case without reference masks
Open HCC-TACE-Seg and search for HCC_001__c-a-p__acq-1. This series is small enough for a quick run, it is a contrast-enhanced abdominal CT, and the MedSeg import provides it as unlabeled image data.
On the dataset detail page, select the checkbox next to that case. The row shows the important basics: CT, abdomen, tumor, contrast-enhanced, 512 by 512 by 30, and 5 mm slices.
4. Add the case to a project
Click Add to project. Choose an existing project or create a new one. A project name like HCC liver demo is enough for this workflow.
Leave Also clone the dataset's reference segmentations off. This case does not have a reference segmentation in this import, and keeping the box off makes the intent clear: the workflow starts from the CT image, not from an existing mask.
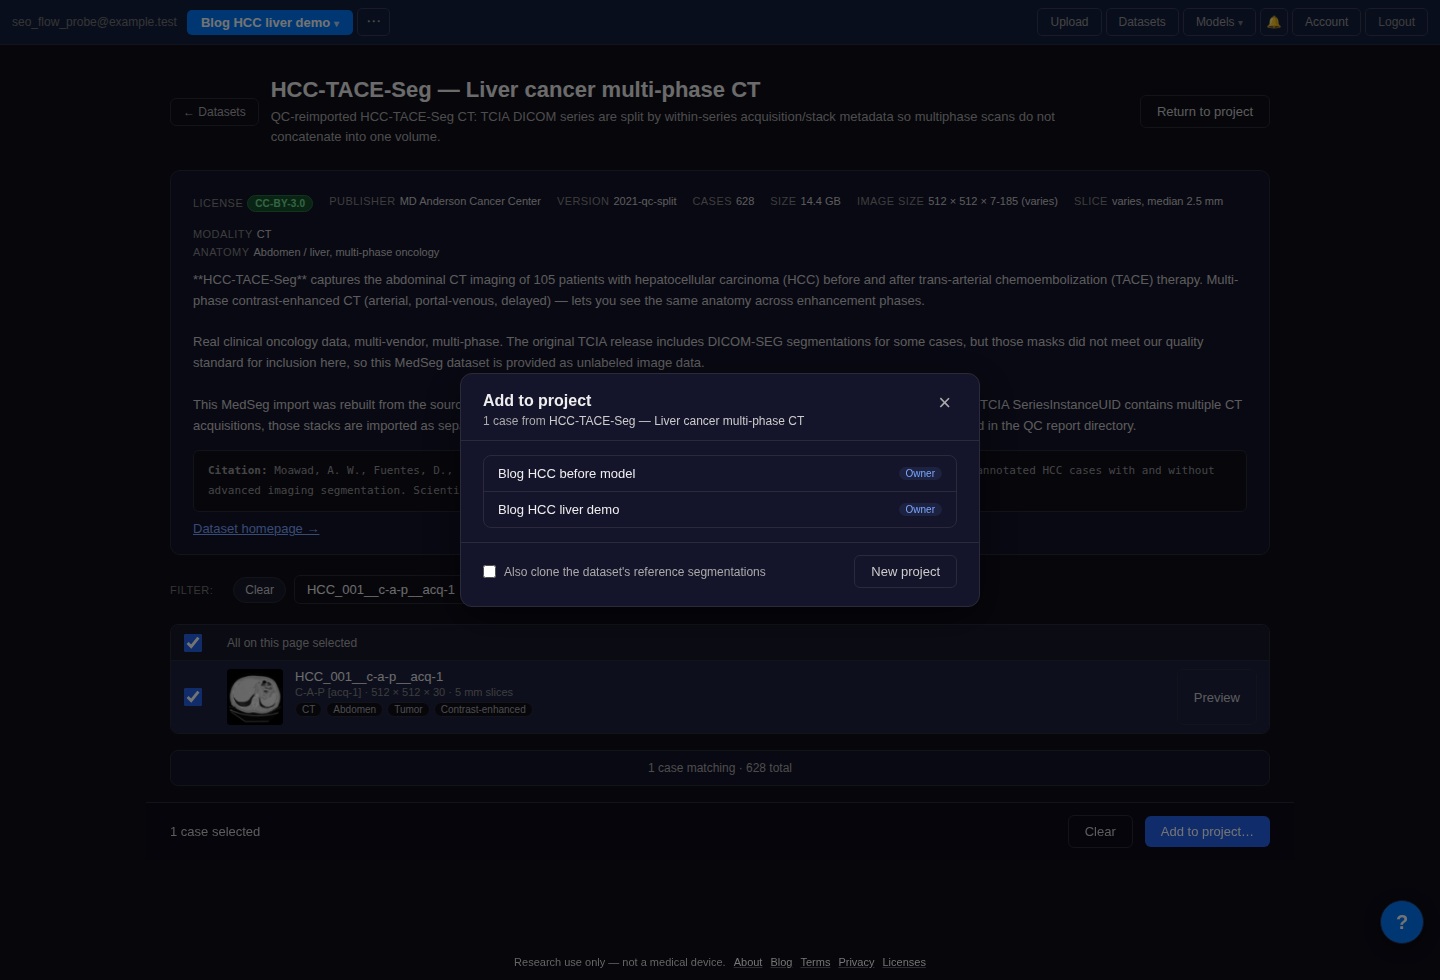
Open the project after the copy finishes. The Seg column should be empty. That is the quick check that you are not looking at a copied mask.
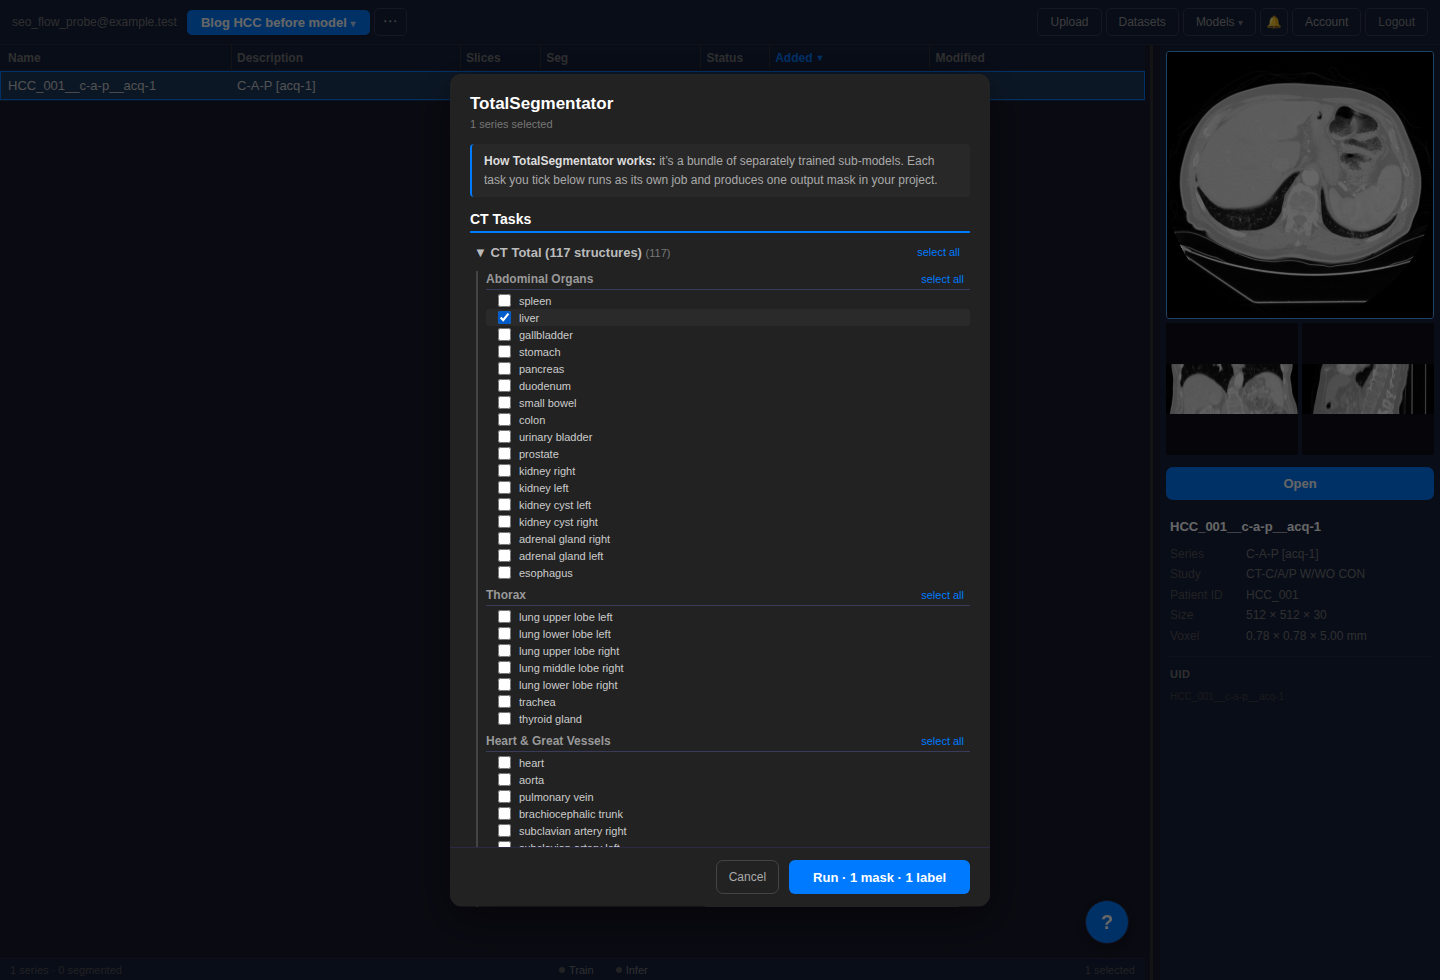
5. Run TotalSegmentator with only liver selected
Select the row, click Models, then choose TotalSegmentator. In the TotalSegmentator modal, expand CT Total (117 structures), then expand or scroll to Abdominal Organs.
Select only liver. The run button should read Run - 1 mask - 1 label.
Click Run. When the job finishes, the project table shows a new segmentation named TS-total. The thumbnail panel on the right gives a first pass view of the mask in axial, coronal, and sagittal planes.
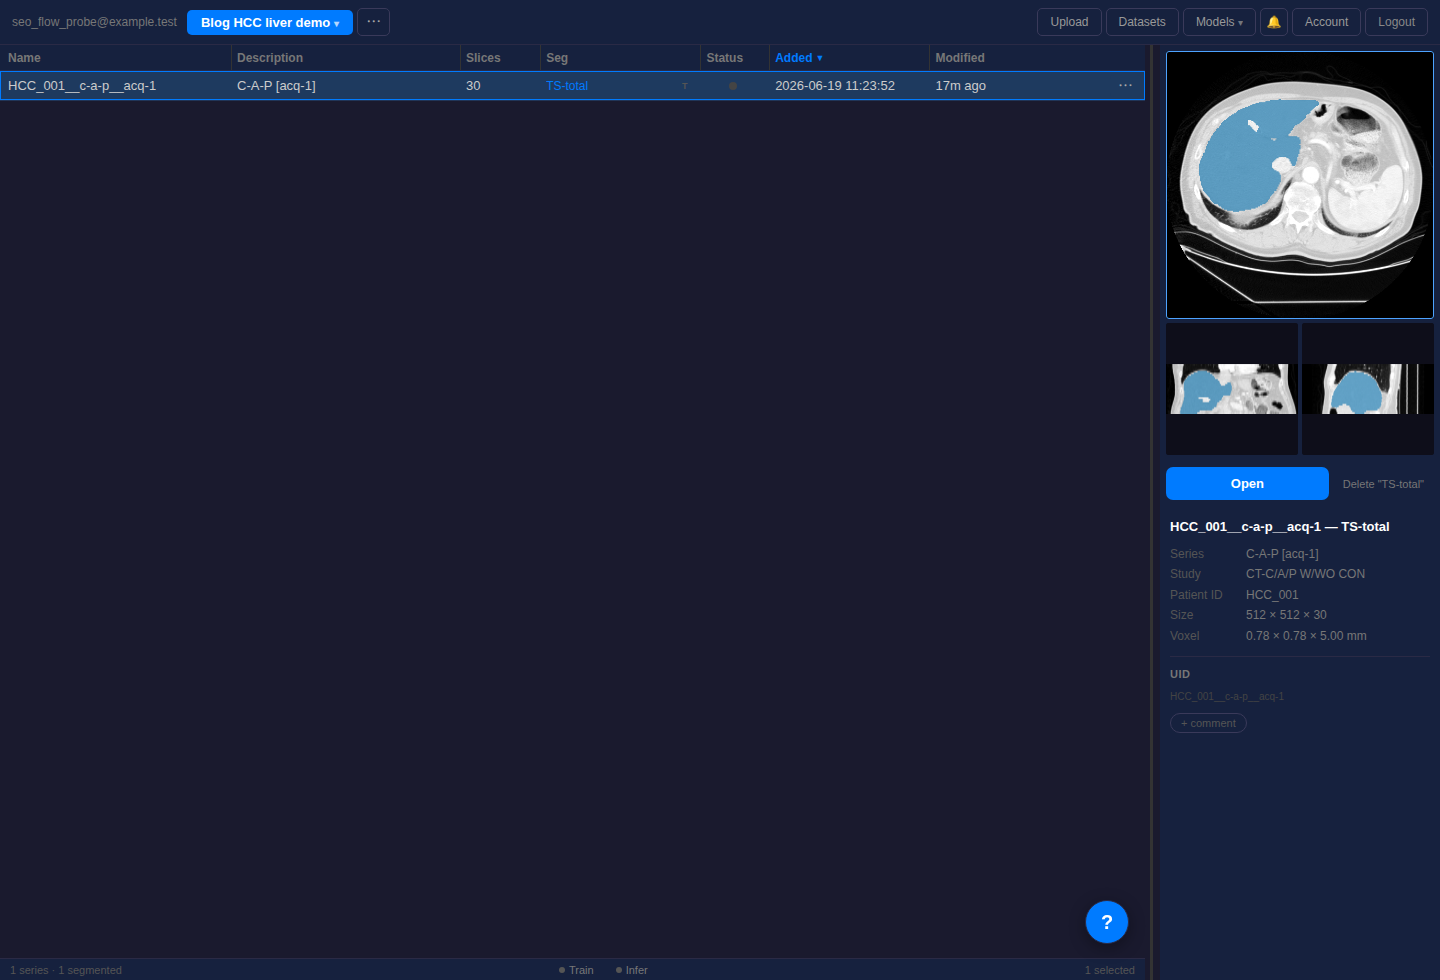
TS-total mask appears in the Seg column and in the preview panel.6. Open the result in the editor
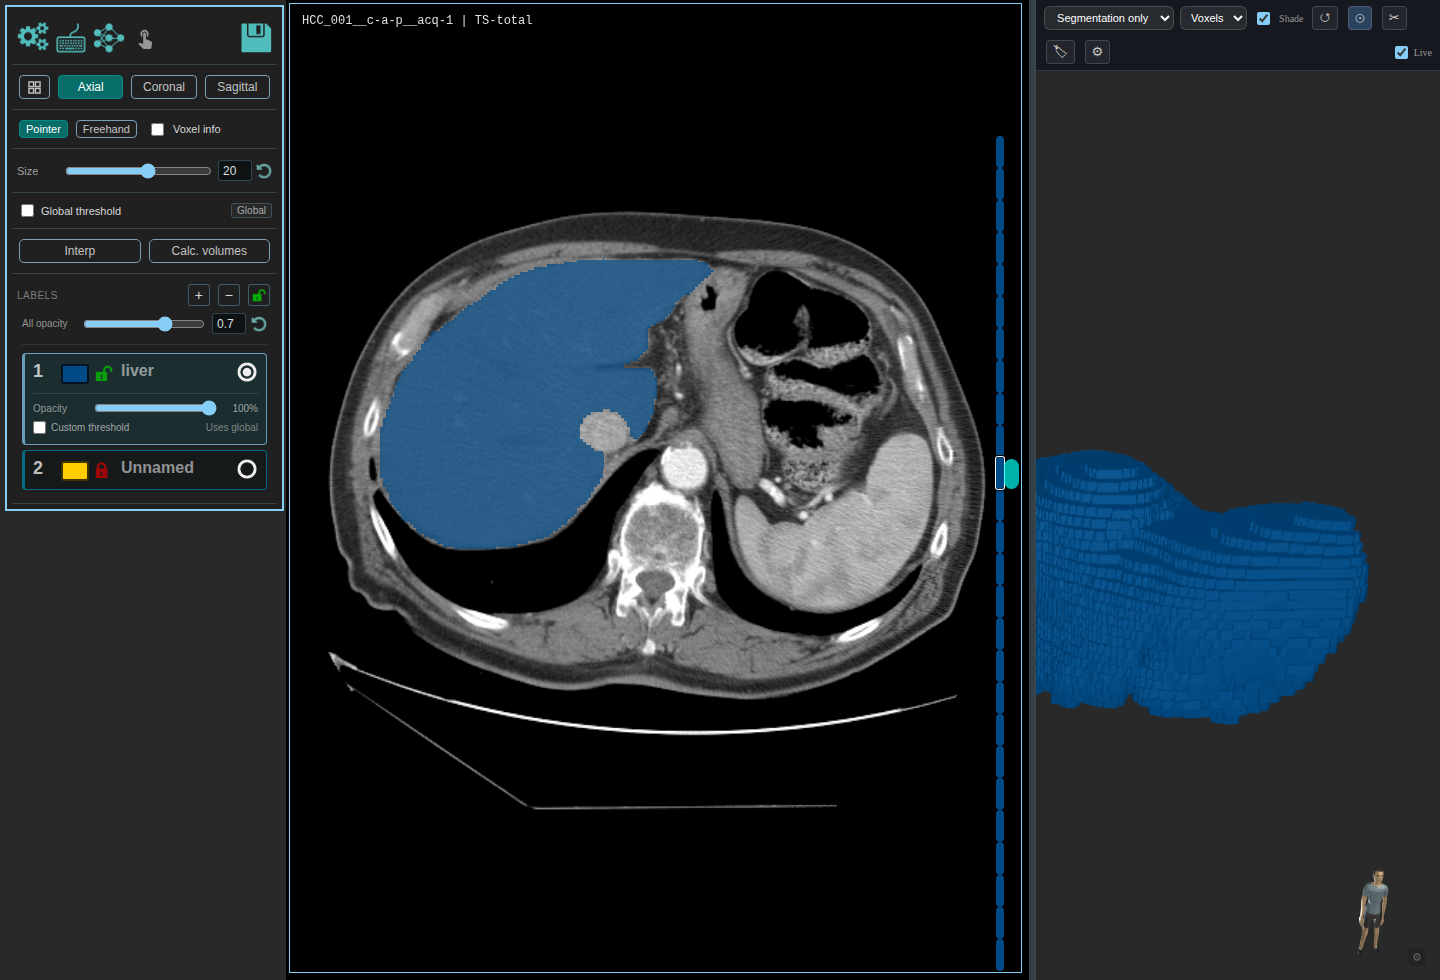
Open the TS-total segmentation in the editor. You can click Open, double-click the project row, or double-click one of the thumbnails in the preview panel. For abdominal CT, use a soft tissue window when reviewing the liver boundary.
In the editor view below, the liver label is blue and the right panel shows the 3D mask preview. Scroll through the slices and check the borders before using the mask for anything else.
7. Check the mask before trusting it
A generated mask is not done just because the model finished. For this liver case, check:
- Does the liver label stay inside the liver capsule across the slices?
- Does it leak into stomach, spleen, body wall, or nearby vessels?
- Does it miss superior or inferior liver slices because the scan stack is short?
- Is the label you selected actually the label you wanted? Here it is liver only, not tumor.
This specific case has 30 slices. The volume number is useful for checking the workflow, but it should not be presented as a validated organ volume without reviewing the whole image stack and the study context.
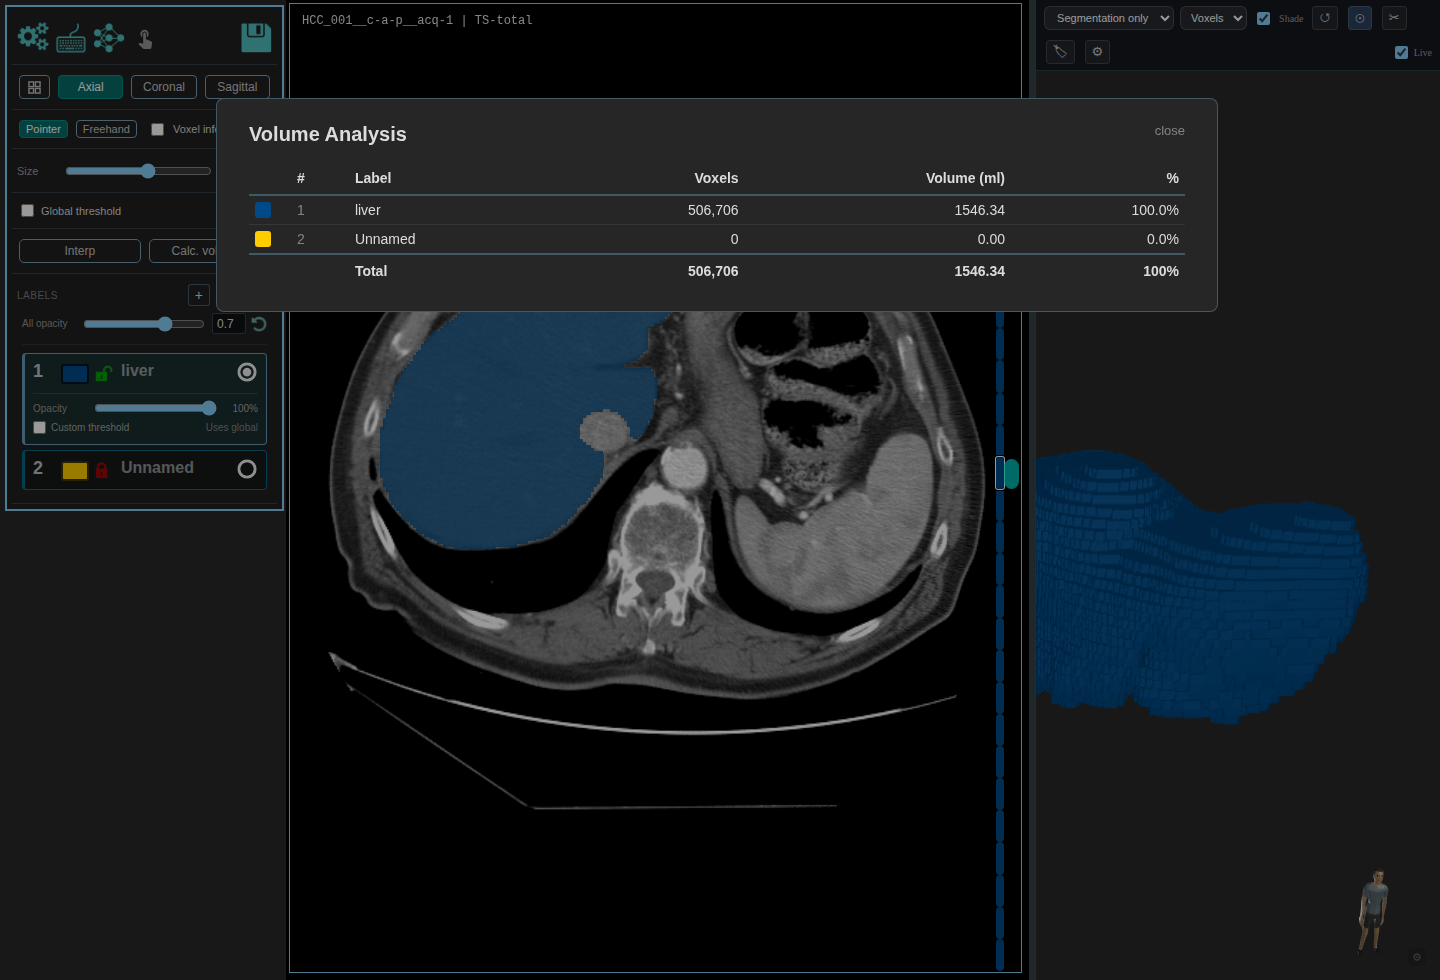
8. Calculate volume
Click Calc. volumes in the editor. In this run, the liver label measured 506,706 voxels and 1546.34 ml.
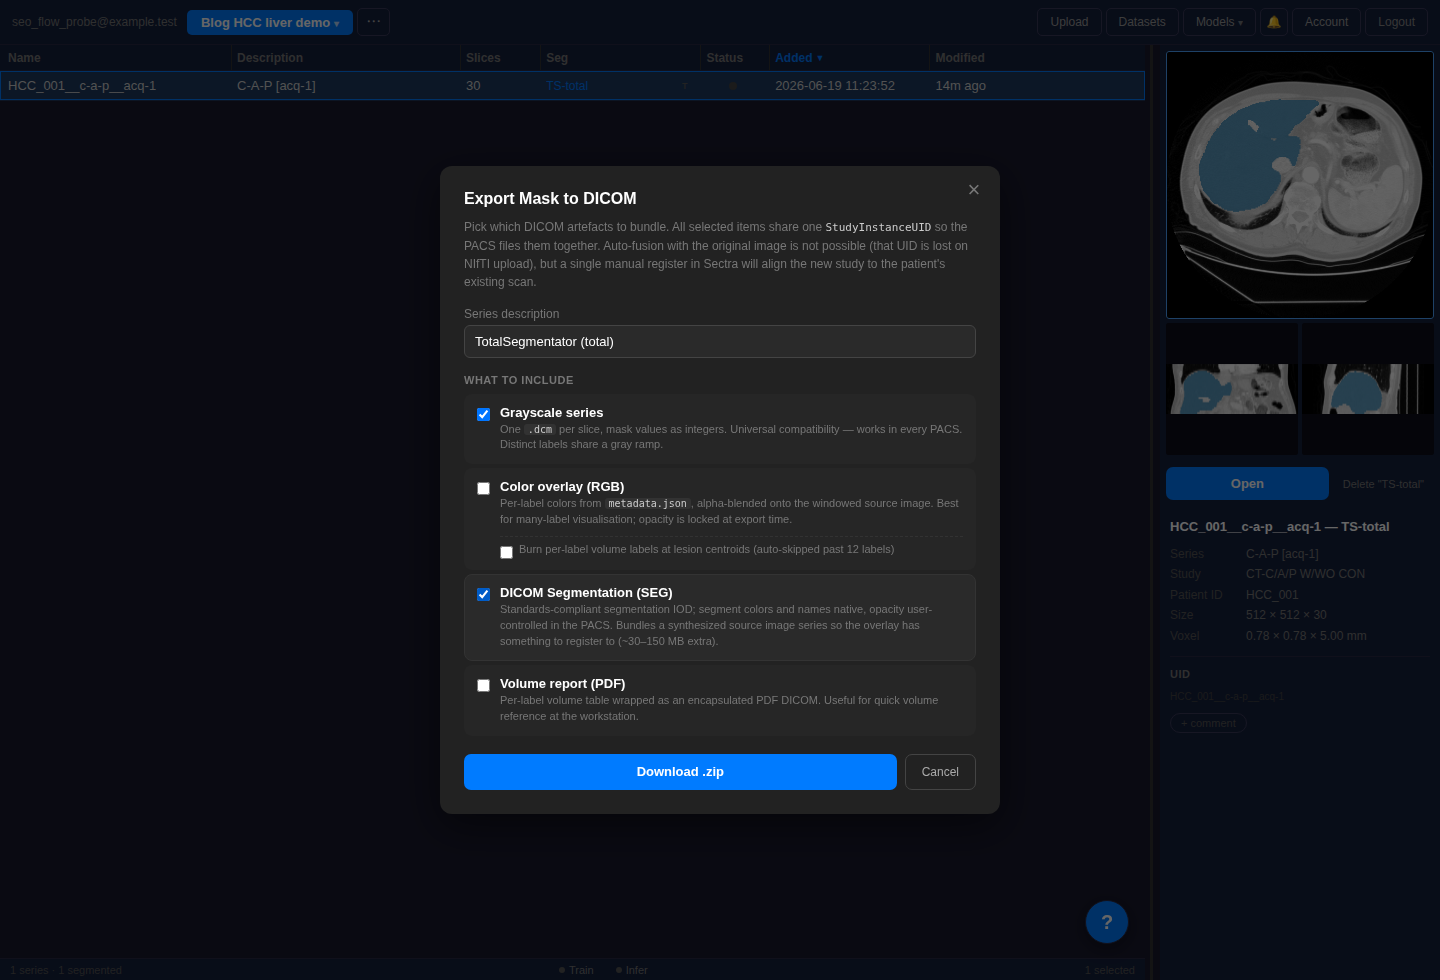
9. Export the segmentation
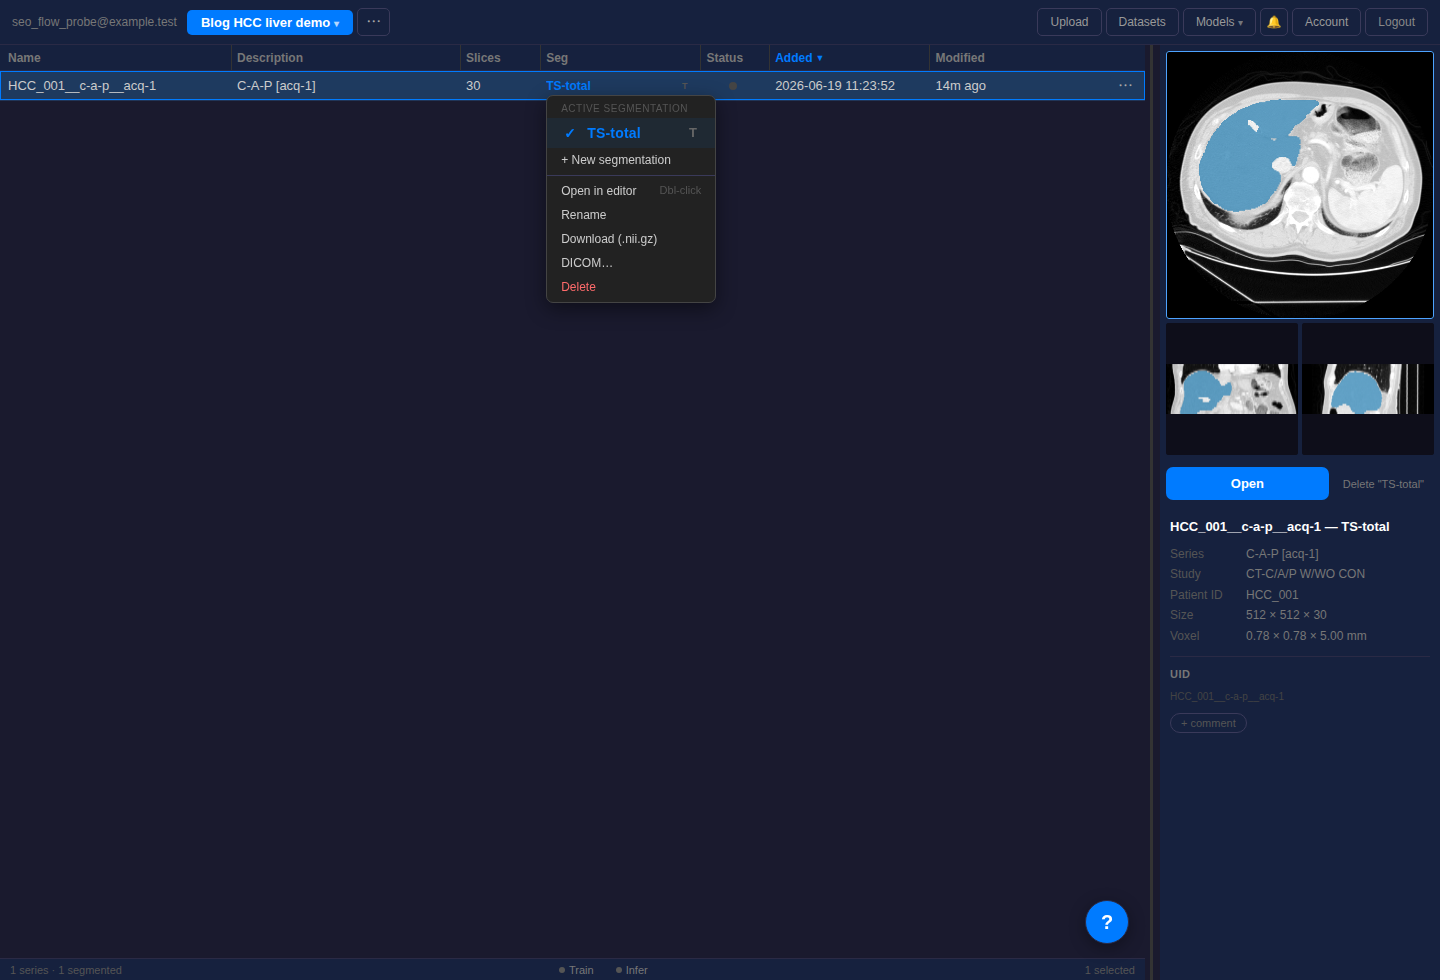
Back in the project table, click the active segmentation name, here TS-total. The menu gives two common export routes:
- Download (.nii.gz) for Python, nnU-Net, MONAI, and most research scripts.
- DICOM... when you want a DICOM bundle, including DICOM SEG for compatible viewers.
If you choose DICOM, select the artifacts you need. A common choice is to keep grayscale series on, then add DICOM Segmentation (SEG) when the downstream viewer supports it. See the DICOM segmentation page for more detail on export formats.